We’re edging closer and closer to the next release and finally beta phase 3! At our current pace it’ll be about two weeks depending on how demanding the bug load is and how much more work multiplayer support is going to be. Multiplayer is so close to working but needs another push.
This entire week was devoted to adding new skills. Kelley and I have made some great progress and only a few remain. One thing to note is that these new skills are not merely an extension of the existing skills. Much more has been going on!
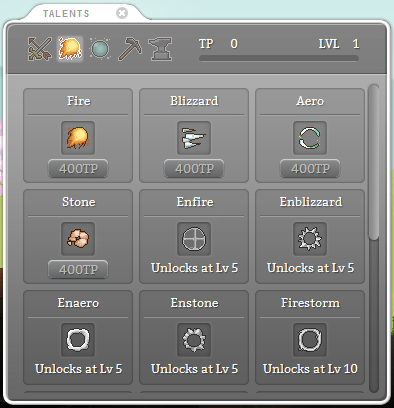
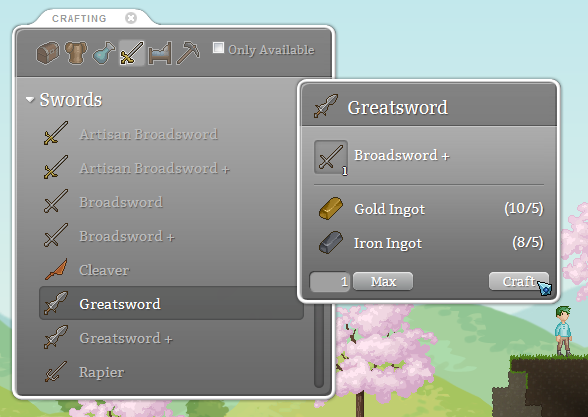
Cleaned up Talent UI
First of all, we gave all skills an unlock level. Once your talent reaches the skill’s unlock level then that skill becomes available to level up. The primary motivation behind this is to limit the number of options the player has to choose from. I believe it was a little too overwhelming for a player to have to choose between all of the skills up front. Not to mention this was for 4 different talents totaling nearly 40 skills. Now each talent starts with 3-4 skills unlocked at level 1 and more unlock at levels 5, 10 and 15.
There was another major change to the talents. The existing “Magic” talent was split it into two – “Arcane” and “Divine”. Arcane magic focuses on elemental offensive magic and Divine magic focuses on support magic.
Arcane talent has a total of 16 skills at the moment. There are 4 different types of magics and 4 elemental types of each. The spell types are: projectile, enchant melee weapon to do elemental damage, area of effect around the player, and pillar magic. I decided it would be easiest to treat all elemental types equally and that is why each element has a similar magic type.
Casting Freeze
Divine talent has 12 skills which consist of healing, positive status effects and a few passives. Just because they are support doesn’t mean there are not game changers! Stoneskin will absorb some damage, making it possible to take harder hits or fall further. Invisible makes you invisible and monsters wont aggro you. Fun stuff!

Casting Invisible
The Arms talent has also received many new active skills to keep up with the magics. However, Gather and Craft talents are more or less the same. For now, I’m happy with where they are at.
As you can see, lots of good stuff! This next week I’m wrapping up the remaining skills and moving back onto working on the underground. I’ll also start looking into some bugs that are in 0.6.0 and beginning to prep things for v0.6.1. Most likely, there will also be a v0.6.2 to fix issues in v0.6.1. Then I plan to launch Crea’s greenlight page and the next beta phase.
Rolling over some very low level monsters with Firestorm